
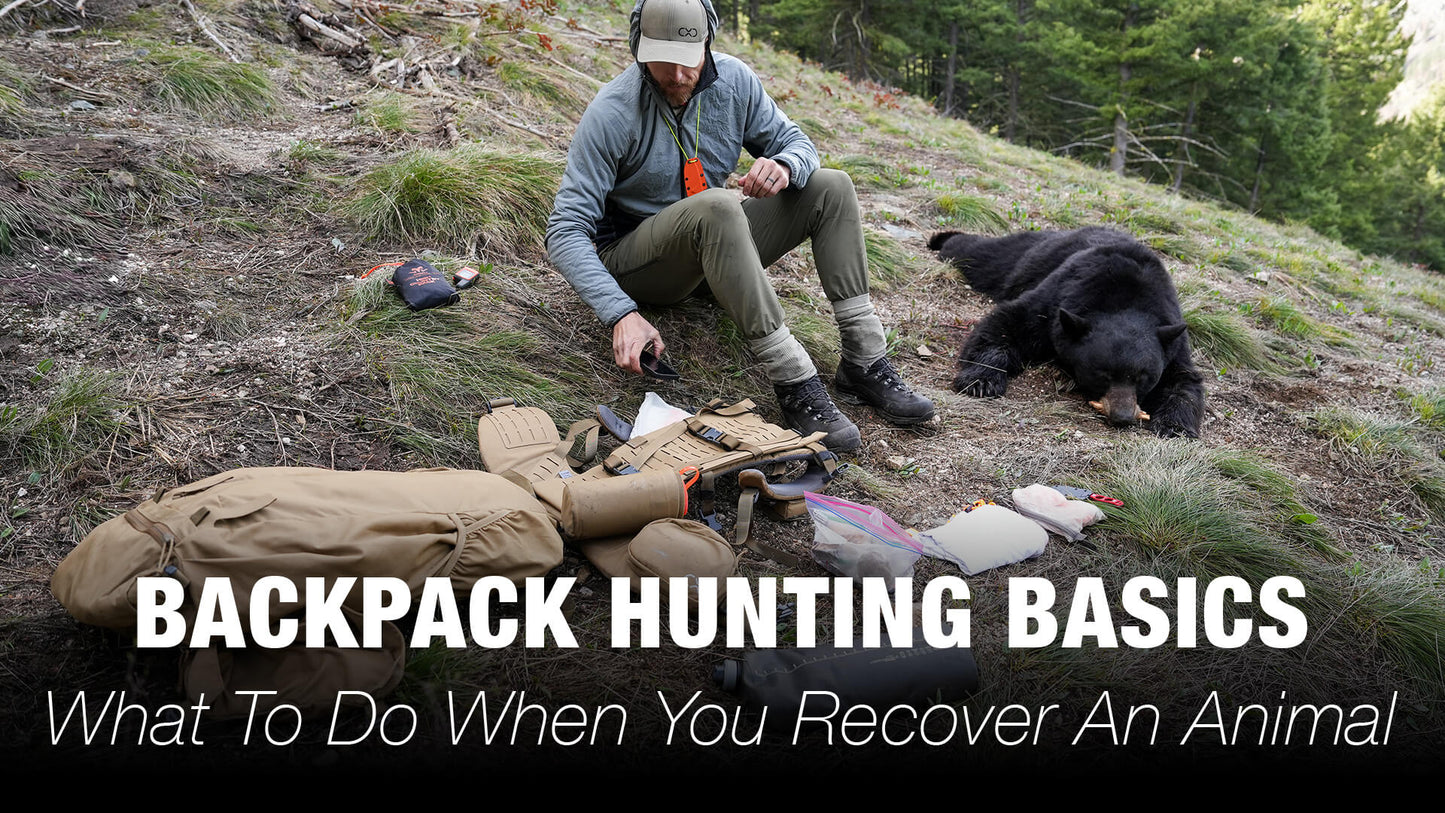
The hunt ends, and the work begins. When you recover an animal, there is a combination of excitement, accomplishment, and often circumstances (such as fading light, rising heat, or quickly passing time) that can make you feel a bit rushed. But before you start turning this animal into high-quality protein to feed your family, it is worth pausing, planning, and organizing before you start skinning.
In this video, we explain some of the first things to do after you recover an animal.
Safety First
Before you do anything, make the area safe. This includes thinking through the big 3 dangers for hunters: bullets, broadheads, and blades. If you have a rifle, be sure it is unloaded. If you have been bowhunting, make sure all broadheads are secure. Before you grab your knife and start processing the animal, follow the steps in the rest of this article.
While we are talking about safety, let’s skip ahead for a moment to the time when you do start breaking down an animal. Keep a high focus on knife safety throughout this process — it is important when solo, but there are even more opportunities for accidents when you are with others and working together to process an animal in the field.
Never lay a knife down if it is not fully protected — such as having a blade in the sheath, or folded into the handle. If you are skinning or quartering and someone is helping, never cut with the blade edge moving in their direction. And communicate clearly as you work, so that everyone knows where to hold, where to move, and where to cut.
Yes, these are basics that sound overly simplistic as you read this, but we have seen simple mistakes create big problems in the backcountry.

Make It Legal
As soon as the weapons and environment are safe, legally validate your kill. The exact steps will vary from state to state, or even by species, but be sure you are following protocol — whether that is cutting your tag, electronically validating a harvest record, attaching a tag to an animal, or something else.
This is also a good time to pause, consider, and communicate (with anyone with you) what may be required as you break the animal down, such as leaving proof of sex with one of the hind quarters, and ensuring you take every legal part of the animal from the field.
Fuel For The Task
One of the mistakes we have made too many times in the past is not having proper hydration and nutrition for the processing and packing an animal. Before you get busy (and your hands get bloody), take a few moments to make sure you have water available. If needed, go filter some from a nearby source.
Also consider your calories. You may not be hungry now, but at a bare minimum, make some snacks accessible for when you finish processing and start hiking with a pack loaded full of meat. I typically grab a snack before I process the animal (more on that in a second), and then put some snacks in my K4 Hipbelt Pouch so that I know I have something accessible for the heavy hike that is soon to come.

Mark enjoys a coffee and a snack while sitting and reflecting on the wild adventure that led up to this moment in Alaska.
While we’re talking about eating and drinking, let me urge you to consider stopping and taking a break in this moment — after the "hunt" ends, and before the "work" begins.
If you aren’t rushed by fading light or rising temperatures, take 10, 20, or even 30+ minutes to stop, soak in the sights, sear the memories in your mind, and enjoy the moment with gratitude. These moments of reflection (usually with a coffee and a snack) have become some of my favorite times spent on any hunt.
Tools Of The Trade
It is almost time to get to work, so gather the tools you need. As shown in the video above, we like to keep a K4 Stash Pocket with our "kill kit" — knife, sharpener, gloves (if you use them), some cordage to hang quarters nearby, and/or a small tarp or sheet to lay meat on (if you use one).
Get your game bags out of your pack. And if your game bags are packaged, take the time to get each one out and lay them out in an accessible location. (If it is windy, set a rock or some other object on any game bags that you lay out.)
When you (or your buddy who is helping you) are wrestling a big quarter off the animal, having an accessible and "ready" game bag to get that quarter into will make the process much easier.
Prepare Your Pack
Alright, last step before you put your knife to work.
Take a look around the area and make sure you have what is needed, but also put away what isn’t needed. Is your rangefinder sitting out? Put it away. Did you grab some other gear out of your pack when you were looking for your food or kill kit? Put that away as well.
Before your hands get bloody and time gets busy, take a moment to put away anything you don’t need to process and pack the animal.
And once you’ve done that, get the pack ready to be loaded with meat. With our K4 Packs, this means taking just a couple of seconds to open up the load shelf area — where the meat will be secured to the frame.
It is also incredibly helpful to position the pack in a spot that makes loading easier. In steep or rough terrain, place the pack in a spot that the meat will sit on the frame without rolling off as you try to load it.
Get To Work
Now it is time to cut some protein! We hope these tips help you on your next successful hunt.