
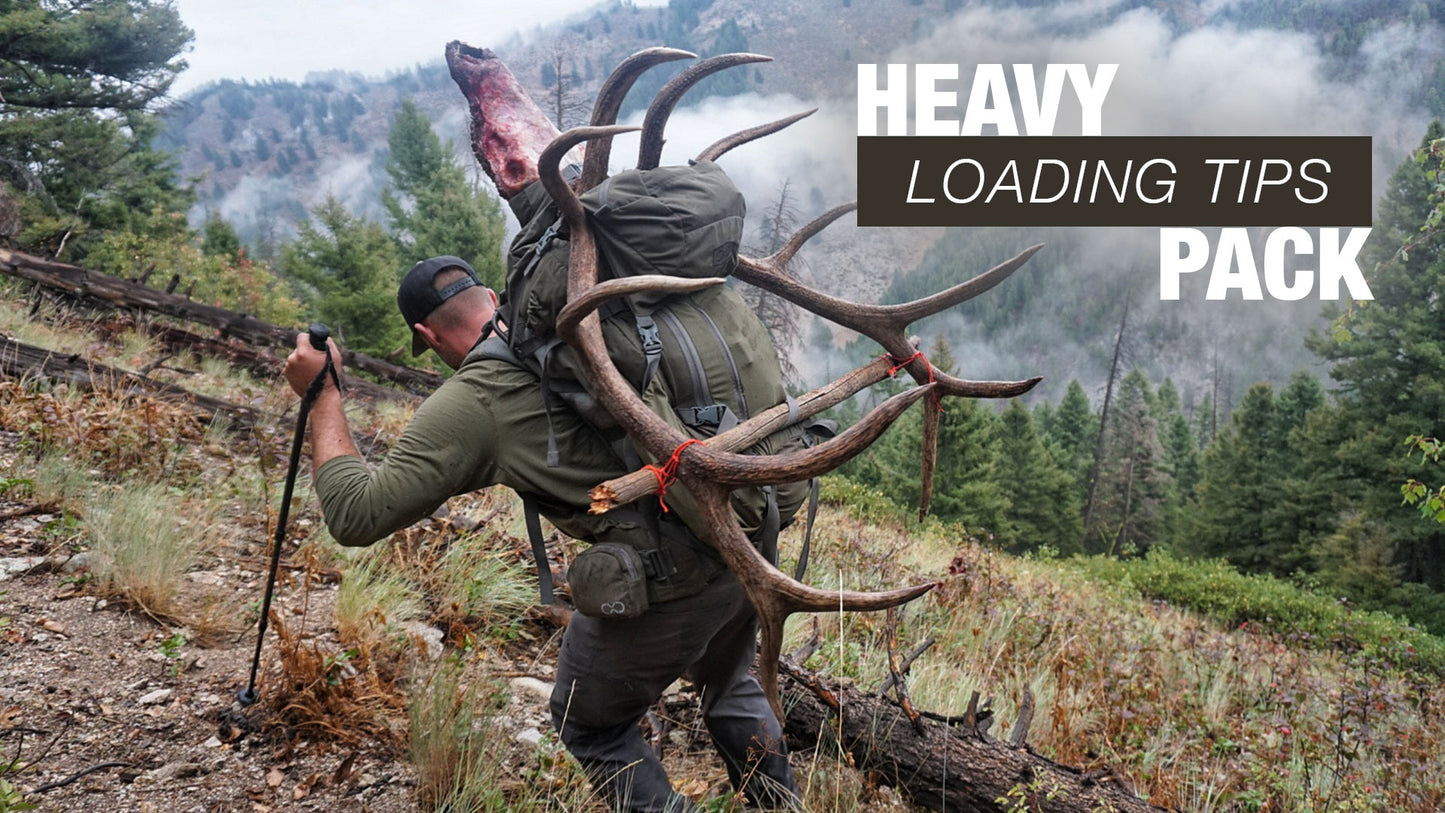
Your hunt just ended, but the real work is just beginning. Now that you have killed the buck, bull, or another animal you were after, you have a lot to do and take care of. It all starts with making it legal and punching your tag, then you have to care for the meat and ensure you can bring home as much of this hard-earned protein as possible.
If you're backpack hunting, you may be miles and miles from the truck. And in addition to packing-out the meat, you also need to bring a pack full of gear back with you. This is going to be a heavy haul!
In moments like these, the performance of your pack — and ultimately how enjoyable or miserable the next few hours are going to be — will be determined by three main variables...
First, the quality and capabilities of the pack. Secondly, the fit and adjustment of the pack to your body. And, finally, how the load (meat, gear, antlers, etc) is secured to the pack. By taking the time to properly load the pack, you can dramatically improve your experience with heavy loads.
In this article, we are focusing on that final point — how to load meat and antlers on your pack. If you missed our prior article on fitting and adjustment, check that out here. And if you have any questions about the quality and capabilities of our packs, reach out and let's chat.
In the first part of this article, we will explain the basics of loading meat and antlers. With that understanding established, we will then move on to look at some real Exo customer photos and assess what they did well and/or what could be improved with how their pack is loaded. We then wrap-up with some additional tips for pack loading.
Before You Get Started
With an animal on the ground and the tag legally validated, begin planning for the pack-out before your knife ever breaks hide. Take a few minutes to organize your gear. Put away what you don't need, find the gear you will need, and keep it readily accessible. If you have the time, take a quick break to grab some water and a snack before you start breaking down the animal. Hydration and energy from food will be a huge asset for the hike ahead.
Prepare your pack by loading the bag with your gear, exposing the K3 Frame's built-in meat shelf, and if needed, extend the frame height.
With those few minutes spent on preparation, it is now time to begin working on the animal. Let's fast-forward through processing the animal and talk about getting the quartered or boned-out animal onto the pack...
Loading Meat on the Frame
Always keep these fundamental principles in mind — weight should be placed as close to your body as possible, kept towards the mid-to-upper back when possible, and loaded securely to prevent instability.
These principles are many of the reasons (among others) that we have designed our K3 Pack Systems with an integrated load shelf between the frame and bag, allowing you to load meat according to those principles.
For boned-out meat, our K3 Crib Load Panel is a great accessory. Boned-out meat in a gamebag often feels like 60lbs of jello, and the Crib will help contain and stabilize what is otherwise an unshapely and unstable load.
Bonus Tip: The material, size, and shape of your game bags can help contain and give shape to boned-out meat, so consider that when you are purchasing your next set of game bags. Ideally, the game bag is long and narrow in shape, and the fabric doesn’t have too much stretch so that the bags will maintain shape when loaded.
Loading Antlers or Horns on the Pack
Antlers and horns come in all kinds of shapes and sizes. A small buck or set of sheep horns is going to be much easier to pack than a big rack from a mature bull elk or caribou.
Similar to the principles we discussed with meat, we want to keep antlers close and secure. Additionally, we want the skull positioned high on the pack, with the antlers dropping below and back — especially for larger racks. Think "nose up and tines down".

Antlers riding upright and sky-high may look cool to some, but the load will be less stable, you will have more interference with branches and other obstacles overhead, and there are potential safety issues as well.
Elk Pack-Out Comparison
Alright, with our bases covered, let's take a look at some real-world pack-out photos and highlight what was done well, and what should be improved or avoided...

Let’s take a look at three changes we’d suggest for the hunter on the left, and compare that to a great example of proper loading with the hunter on the right.
- The hunter on the left has the elk skull positioned low and on the back of the pack, putting the heavy skull further away from his center of gravity. We’d like to see that skull high on the pack, as the hunter on the right has done.
- With a skull on top of the pack, we want to point the nose up and have the jaw facing the hunter, bringing the antlers down and increasing stability. With the antlers high and far away, the hunter on the left will be “fighting” the side-to-side sway and backward pulling of the antlers away from his body. Yes, the hunter on the right has a small rack, but the position is ideal, even if this were a 300-class bull.
- The changes we have suggested so far for the hunter on the left would dramatically increase his stability and safety — especially in the snowy conditions he is in. To further aid in those areas, we’d like to see this hunter be using trekking poles for this pack-out. Regardless of the conditions, we recommend using trekking poles on every pack-out, as the hunter on the right has done.
Loading Tip — Use The “V”
All Exo pack systems are designed with a quick-access load shelf. The top and sides of the bag quickly disconnect from the frame, but the bag and frame remain connected at the bottom. When placing a load between the bag and frame, that bottom connection between the bag and frame creates a wedge or “V” shape that helps keep the load from sagging.
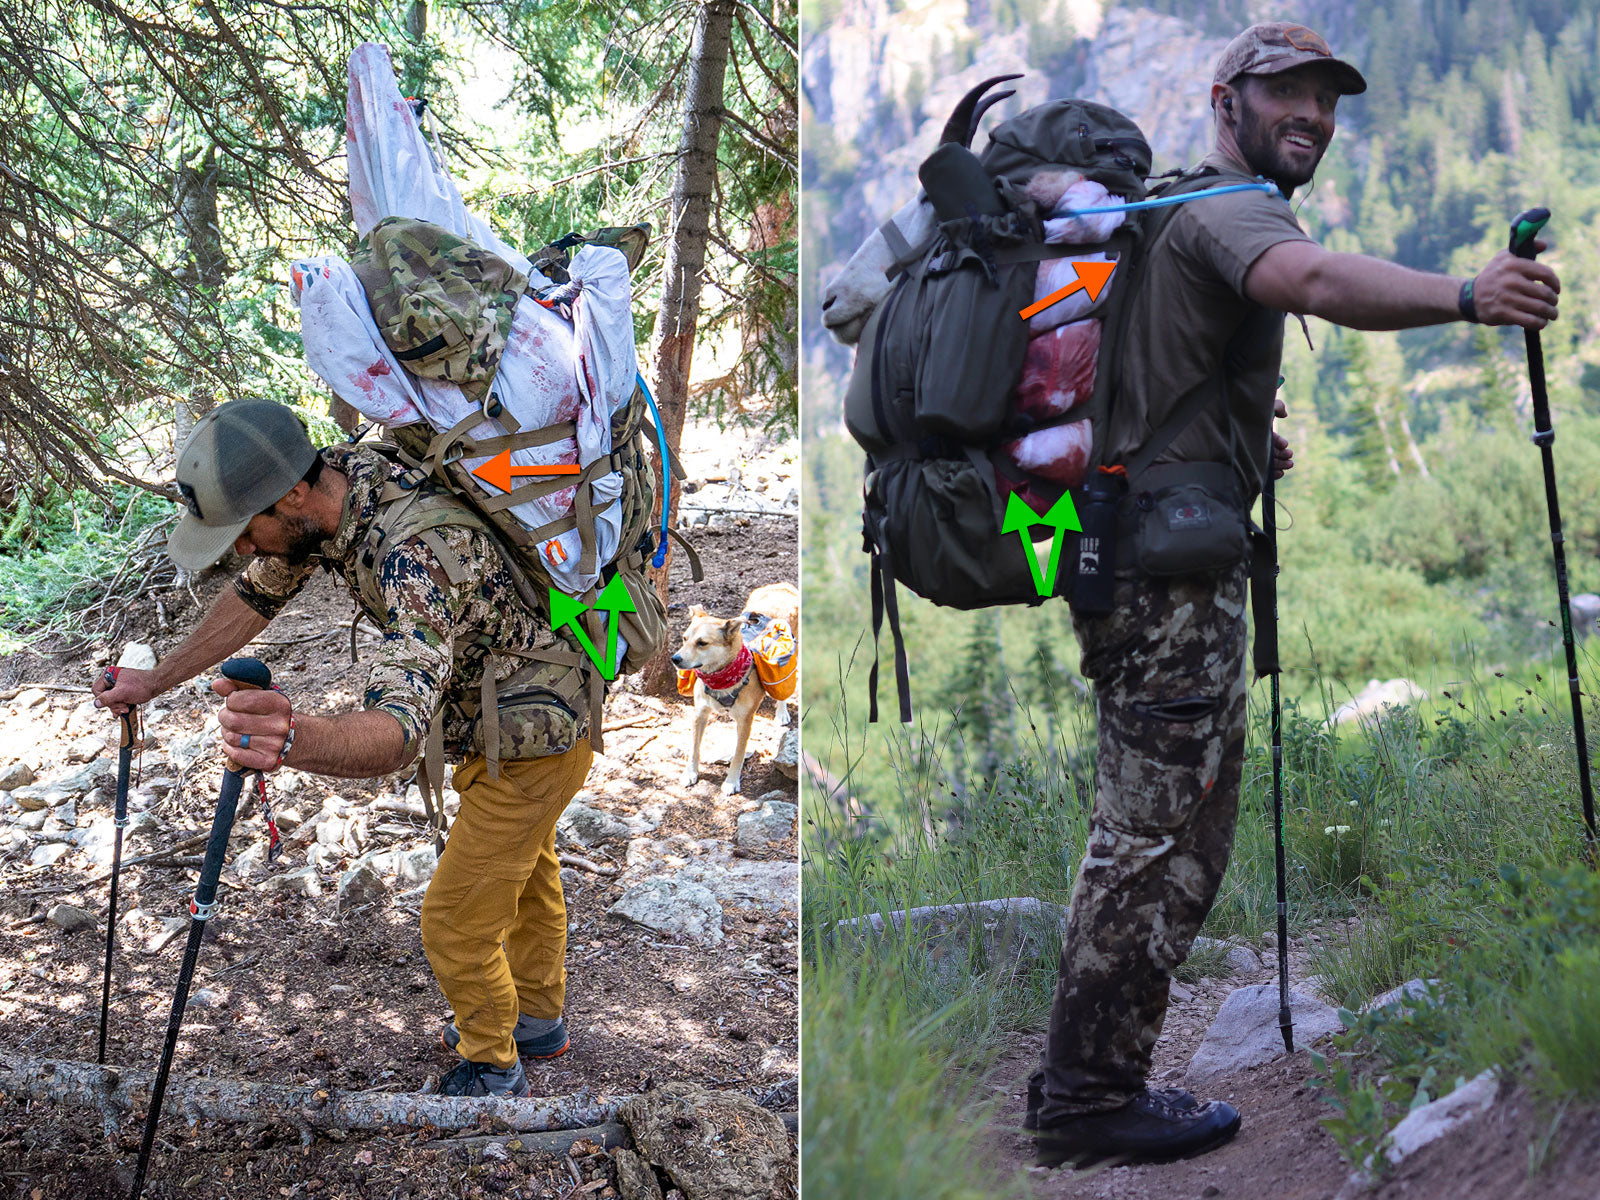
As you can see in the photos above, these hunters have a great V-shaped wedge at the bottom of their pack (green arrows). This wedge, combined with the pack’s built-in angled compression straps (orange arrows) pulls the load up and in towards the body. These design features eliminate sagging and keep the heaviest loads positioned properly.
Loading Tip — Managing Meat
Not only does the position of the meat matter, but the “shape” of the meat can make a difference in the load.

As you can see in the photo above, the hunter on the left has a large “ball” of meat that is low, wide, and round. Compare that to the loaded pack on the right and you’ll see that the meat is narrow, “flat” against the frame, and positioned along the length of the frame. The slender shape of the meat on the right will help distribute weight evenly and will also allow the full pack full of gear to ride closer to the body, creating a more comfortable load.
Loading Tip — Bracing Large Racks
When packing out large racks, it can be helpful to add a brace between the pack and the rack to keep the rack from rocking or tilting towards your body, and also to prevent lateral stability. Let’s take a look at how these two hunters braced their elk racks...

- The hunter on the left used a trekking pole for his bracing. It would be better to keep your poles in your hands and, if possible, use a stick to use for bracing, as the hunter on the right has done.
- The hunter on the left has his brace placed below the pack line. The brace should be placed between the pack and the rack, keeping the brace more secure, and also giving the hunter more clearance between their lower body and the rack.
Loading Tip — Placing Your Weapon
The hunt is over, so where does your bow or rifle go now? In flat and easy terrain, you may be able to keep your weapon in-hand. But for most backcountry pack out you will want your hands free to use trekking poles.
Options for mounting a bow are limited. You essentially have to place it on the back of the pack.

With rifles, you have more options — allowing for either side-carry or rear-carry. Most hunters think of side-carry as offering quicker access to their rifle, and since access isn’t needed during a pack-out, the default thinking is often for rear carry. However, that can create some issues...

When using rear-carry while the load shelf is full of meat, the pack is further away from your body, and the rifle is even further on the outside of the pack. As seen above (left) the rear-carry of the rifle places the weight of the rifle quite far away from the body, which is far from ideal. We have found that keeping a rifle in side-carry (above, right) offers more comfort and better weight distribution.
Your Next Heavy Haul
We hope these tips and examples help you with your next pack-out after a successful hunt. Remember that by taking the time to properly load the pack, you can dramatically improve your experience with those heavy loads. The few minutes it takes to load your pack the right way will mean more comfort for the hours it may take to pack your animal out of the backcountry.
Here’s to hoping you can load your pack with some meat and antlers soon!